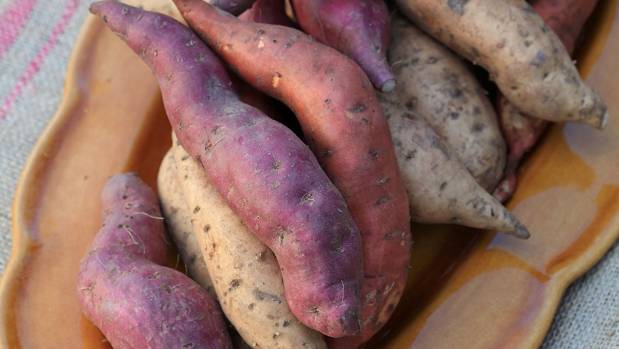
Kumara: plant, care, harvest & storage tips

Buy Kumara runners from garden centres in October or start your own by sprouting a Kumara in a pot of moist sand. When the shoots are about 15cm high with leaves and roots, remove them for transplanting. Push the plantlets into the ground gently at a depth of around 50mm in the shape of a "j" lying down, with the long edge running parallel with the top of the ground. If you plant vertically pointing down, it can be too cold for the Kumara to form off the nodes. Don't cut back the runners. Lift them off the ground regularly to discourage formation of surface roots which waste energy that could go into tuber formation.
Most growers like to apply lime before planting because Kumara prefer a pH of 6.0-6.5. It is possible to grow Kumara in the same place year after year but some form of crop rotation is preferred to help minimise the build-up of soil diseases. Black beetle, crickets, nematode and white fly caterpillars are the usual Kumara pests.
WHEN TO HARVEST YOUR KUMARA
It can be hard to tell when to dig for Kumara as the tops don't die down when the tubers are ripe. As a rule, Kumara take five months from planting to harvest, but if the spring and summer have been cold, tubers may be slow to reach maturity. Before committing yourself to digging up the whole bed, do some careful bandicooting in a couple of places to see what's happening underground. Size isn't the only thing to look for; only mature Kumara will store well, so check the skin is firm and cut one into a couple of pieces. The cut sides will dry quickly if the Kumara is ready to store.
There are other factors to consider when harvesting Kumara. The day you lift your crop should not be too hot – excessive heat is said to blister the Kumara – nor wet. Ideally lift your tubers after three or four days of dry weather (also dig your fingers through the soil to check it feels dry). If you've got a lot of tiddlers, peel or scrub them well and cut into pieces roughly the same size. Blanch in boiling water for two minutes, then free-flow freeze. They'll come in handy for winter soups and stews.
HOW TO STORE KUMARA
The key thing for ensuring Kumara store well is that they are not exposed to moisture, which will make them rot, or light, which will make them sprout. Create the right conditions by wrapping them in newspaper and keeping them under your bed or in a cool, dark cupboard.
Make sure the Kumara you plan to store have not been bruised or nicked – lift them by hand to ensure the soft tubers don't get damaged by metal tools. So the best storage area for Kumara is somewhere dark and dry. Avoid putting them in high humidity areas such as your kitchen or laundry. Don't wash your Kumara as they store much better when the skins are dry. Spread them out somewhere cool and airy to dry the skins for a week or so.
According to Wiremu Puke of Te Parapara (the traditional Maori garden at Hamilton Gardens), medium-sized Kumara are the optimum size for storing. Kumara that are very big don't store too well, as they contain a lot of moisture. The old people used to leave Kumara in the ground until the leaves went brown," he explains. "Just make sure to harvest them before a frost, as that will turn them mushy."
NZ Gardener
SHARE:

